커스텀 에디터를 이용한 맵툴 제작

GUILayout.Label(string text );

GUILayout.Label("Map Name");=> 윈도 류창에 텍스트 라벨에 원하는 string을 표시할 수 있다.
EditorGUILayout.TextField( )
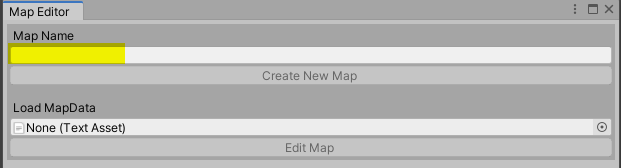
_strMapName = EditorGUILayout.TextField(_strMapName);
 GUI.enabled = (_strMapName == string.Empty || _strMapName == null) ? false : true;
=> 텍스트 입력필드, GUI.enabled을 통해 입력값이 있어야
GUI.enabled
GUI.enabled = (_strMapName == string.Empty || _strMapName == null) ? false : true;=> 해당 코드 아래에 버튼이나 입력 칸을 활성화 처리 여부를 정한다.
GUILayout.Button( )
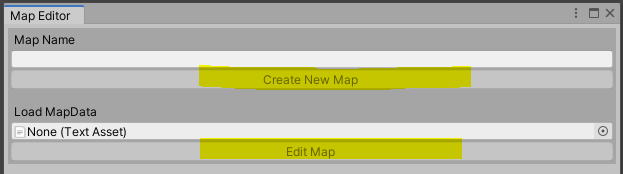
if (GUILayout.Button("Create New Map", GUILayout.ExpandWidth(true)))
{
    CreateMap();
    _bEditOn = true;
}
=> 버튼 , 클릭하면 if안에 함수들이 실행된다.
GUILayout.Space()
GUILayout.Space(12);=> 여백을 준다.
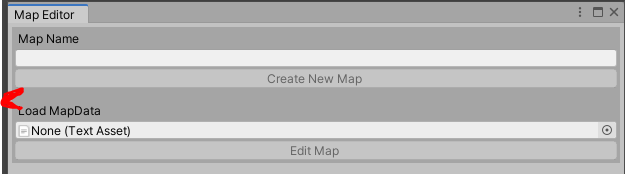
EditorGUILayout.ObjectField()

_txtAssetMapContent = (TextAsset)EditorGUILayout.ObjectField(_txtAssetMapContent, typeof(TextAsset), GUILayout.ExpandWidth(true));=> 설정한 타입으로 입력받을수있는 링크 필드가 생긴다. 나는 TextAsset으로 텍스트 관련 오브젝트만 입력받을 수 있도록 했지만 해당 타입을 그냥 object라고 하면 어떠한 오브젝트도 받을 수 있는 상태가 된다.
'Unity > 에디터' 카테고리의 다른 글
| [유니티 커스텀 에디터] 하이어라키상(hierarchy)의 선택한 오브젝트를 제외한 오브젝트 모두 끄기 (0) | 2021.12.10 |
|---|---|
| [유니티 커스텀 에디터] 하이어라키상(hierarchy)의 오브젝트들의 이름을 한번에 변경하기 (1) | 2021.12.09 |
| 유니티 에디터)커스텀 에디터_기초 (0) | 2019.09.27 |